参考链接:https://blog.csdn.net/song_lee/article/details/105815237
参考连接:从源码编译linux-4.9内核并运行一个最小的busybox文件系统(最新整理版) - 哔哩哔哩 (bilibili.com)
1.前期准备
实验环境
- vmware 16 pro
- ubuntu 22.04
首先需要确认CPU是支持虚拟化的
- ```shell
dawnlake@dawnlake-virtual-machine:~$ lsmod | grep kvm
kvm_intel 434176 0
kvm 1130496 1 kvm_intel1
2
3
4
5
6
7
- vmware可以通过编辑虚拟机设置来开启处理器的虚拟化功能
<!--more-->
- 下载配置内核所需要的依赖
```shell
sudo apt-get install ncurses-dev libncurses-dev flex bison bc
- ```shell
安装交叉编译工具
1
sudo apt-get install gcc-arm-linux-gnueabi
这里先使用Ubuntu自带的qemu
1
2sudo apt-get install qemu
sudo apt install qemu-system-x86
2.下载linux内核源码
1 | wget https://mirrors.edge.kernel.org/pub/linux/kernel/v4.x/linux-4.9.229.tar.xz |
太慢了,直接浏览器下完用vscode往上传的。
1 | dawnlake@dawnlake-virtual-machine:~/Downloads$ ls |
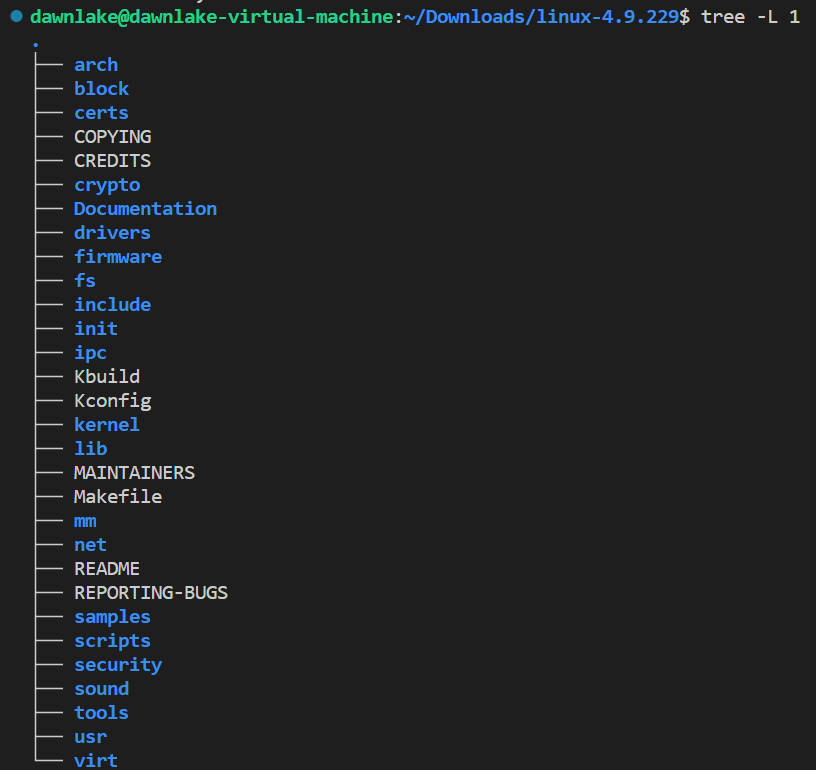
- arch 目录, 和具体cpu有关的代码,例如arm/mach-omap1,即ti公司的soc,此soc的cpu核是ARM提供
- init目录, 内核启动代码。对应到应用层就是main,内核里最早的目录是内核的解压程序,先执行汇编代码让cpu做一些初始化。 初始化完成之后会执行这个目录里的main。
- drivers目录,驱动框架代码,例如i2c,dma, leds 鼠标 键盘 反正就是各种驱动。做驱动开发的可以关注一下。
- fs目录,文件系统
- kernel目录,进程调度进程管理等等 注意和arm/kernel目录的区别。 kernel目录会调用arm/kernel。
- net目录, 网络协议
- include目录
- mm目录 内存相关
3.编译内核
下列命令要在管理员权限下执行,root用户可以不用加sudo
指定硬件体系架构 , 因为开发环境是x86,要编译arm内核就需要指定ARCH=arm且需要安装交叉编译器。 前面已经装好。这只是个临时的环境变量
1
sudo export ARCH=x86
配置board config,此处配置为 x86_64_defconfig。
1
2
3
4
5
6
7
8
9
10
11
12
13sudo make x86_64_defconfig
root@dawnlake-virtual-machine:/home/dawnlake/Downloads/linux-4.9.229# make x86_64_defconfig
HOSTCC scripts/basic/fixdep
HOSTCC scripts/kconfig/conf.o
SHIPPED scripts/kconfig/zconf.tab.c
SHIPPED scripts/kconfig/zconf.lex.c
SHIPPED scripts/kconfig/zconf.hash.c
HOSTCC scripts/kconfig/zconf.tab.o
HOSTLD scripts/kconfig/conf
# configuration written to .config配置内核,针对性配置,和实验不想关的就不做配置,避免内核臃肿。
1
make menuconfig
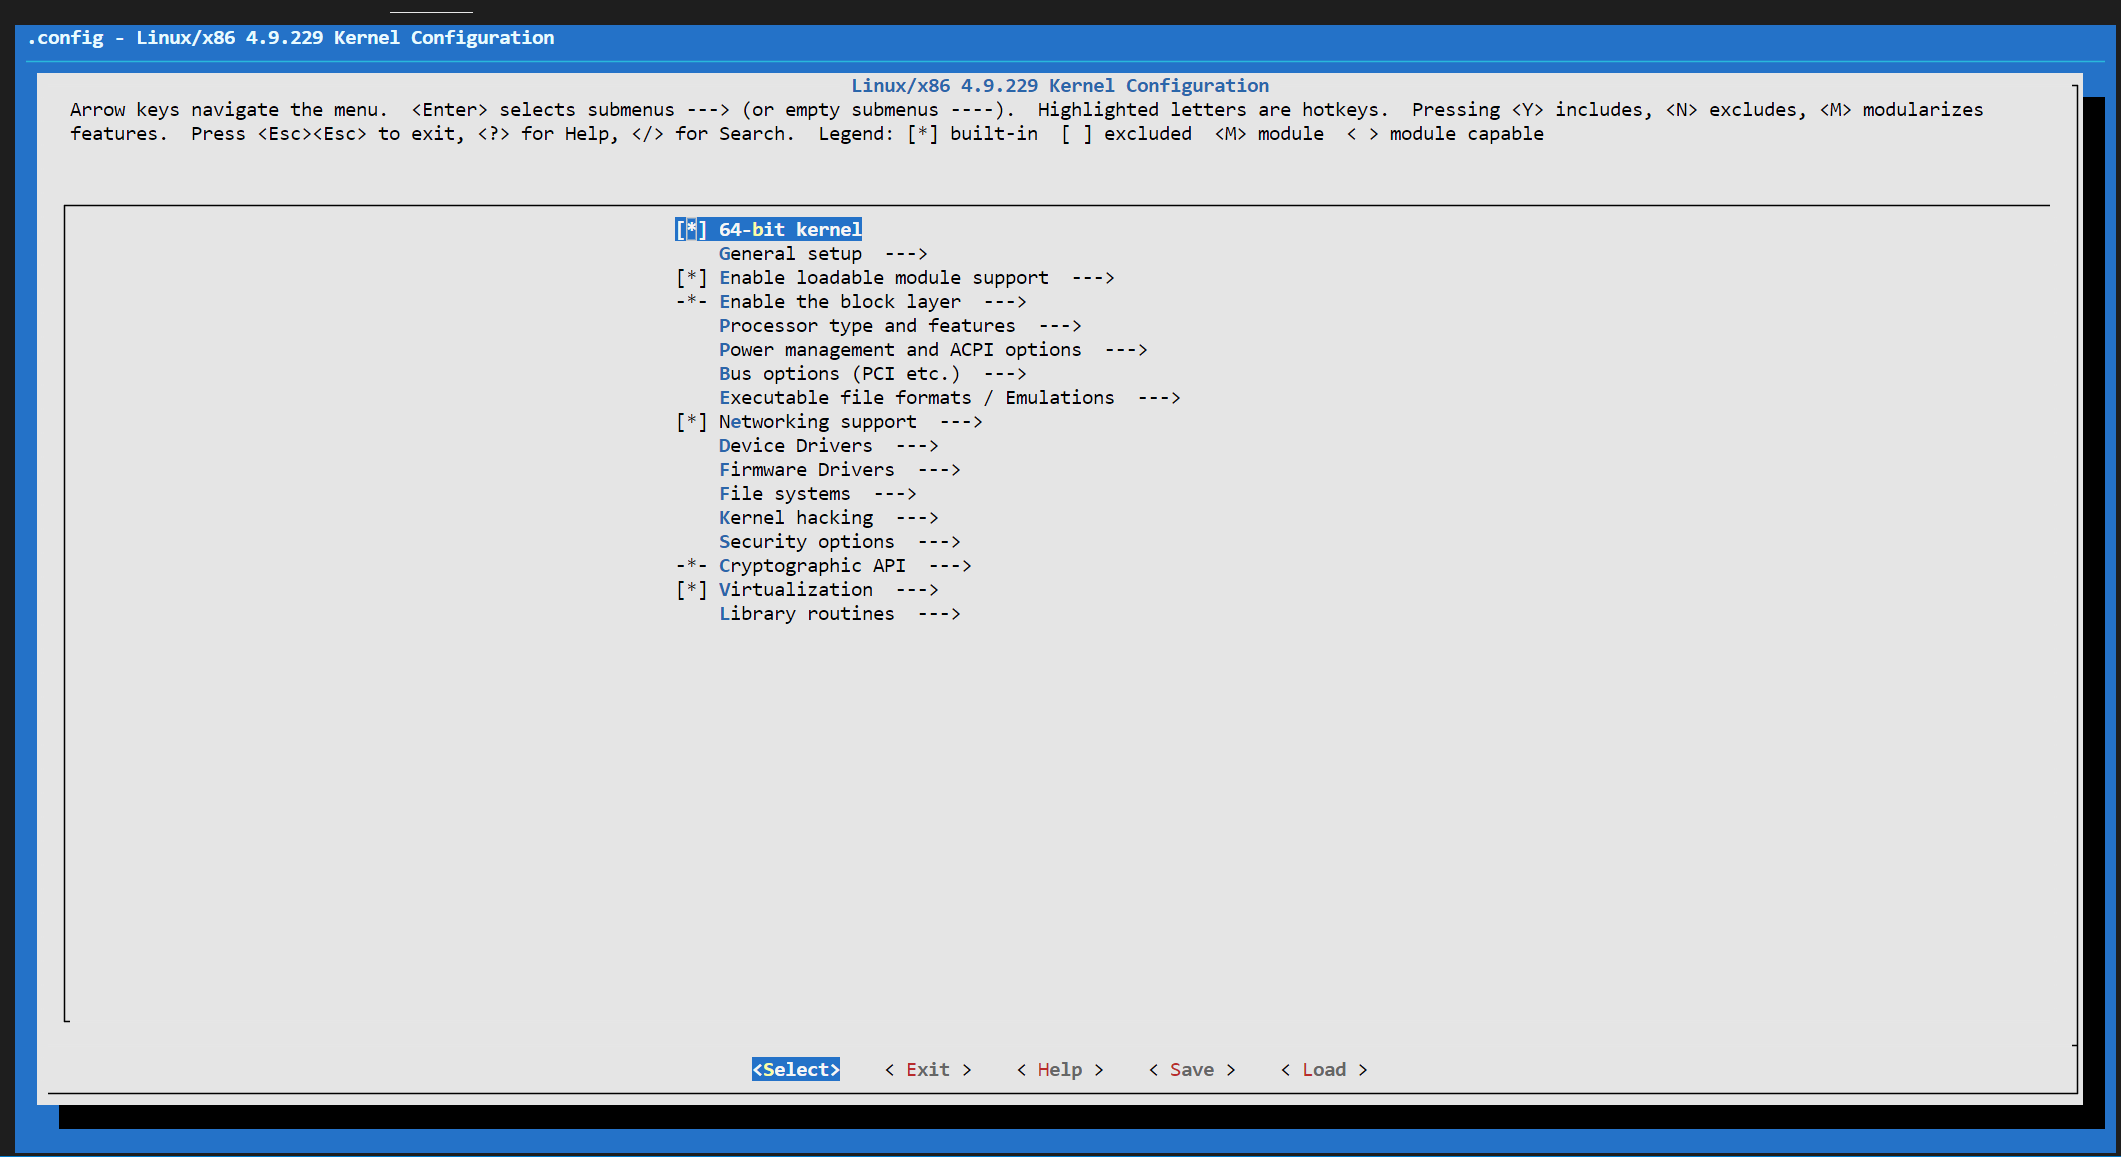
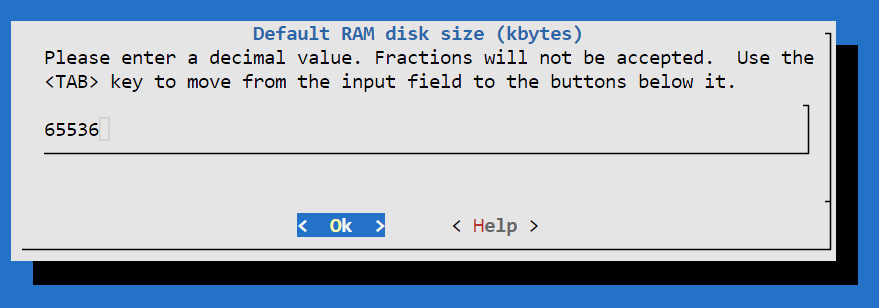
进来之后,([*]代表要选中哈)
- General setup —->
- [*] Initial RAM filesystem and RAM disk (initramfs/initrd) support
- Device Drivers —->
- [*] Block devices —->

操作时候一看就懂不解释了。
- General setup —->
然后执行make编译
1
make
执行完毕后结果显示(找得到的),
1
Kernel: arch/x86/boot/bzImage is ready (#1)
这就是编译好的内核。
4.编译文件系统 busybox
BusyBox: The Swiss Army Knife of Embedded Linux
BusyBox combines tiny versions of many common UNIX utilities into a single small executable. It provides replacements for most of the utilities you usually find in GNU fileutils, shellutils, etc. The utilities in BusyBox generally have fewer options than their full-featured GNU cousins; however, the options that are included provide the expected functionality and behave very much like their GNU counterparts. BusyBox provides a fairly complete environment for any small or embedded system.
BusyBox has been written with size-optimization and limited resources in mind. It is also extremely modular so you can easily include or exclude commands (or features) at compile time. This makes it easy to customize your embedded systems. To create a working system, just add some device nodes in /dev, a few configuration files in /etc, and a Linux kernel.
下载busybox 地址Index of /downloads (busybox.net) 版本: 1.30.0 并解压 报错 建议下载更新版本的>=1.36.0
1
tar xvf busybox-1.30.0.tar.bz2
然后进入到目录下
配置buysbox源码
在这里我们把busybox配置为静态编译,这样busybox在运行的时候就不需要额外的动态链接库了。
1
2
3
4
5make menuconfig
Settings --->
Build Options --->
[*] Build BusyBox as a static binary (no shared libs)操作时候就能看懂
然后编译安装
1
2
3
4
5
6
7
8
9
10
11
12
13
14
15
16
17
18
19
20
21
22make && make install
=======================================================================
/usr/bin/ld: libbb/lib.a(inet_common.o): in function `INET6_resolve':
inet_common.c:(.text.INET6_resolve+0x4a): warning: Using 'getaddrinfo' in statically linked applications requires at runtime the shared libraries from the glibc version used for linking
/usr/bin/ld: coreutils/lib.a(mktemp.o): in function `mktemp_main':
mktemp.c:(.text.mktemp_main+0x98): warning: the use of `mktemp' is dangerous, better use `mkstemp' or `mkdtemp'
/usr/bin/ld: networking/lib.a(ipcalc.o): in function `ipcalc_main':
ipcalc.c:(.text.ipcalc_main+0x231): warning: Using 'gethostbyaddr' in statically linked applications requires at runtime the shared libraries from the glibc version used for linking
/usr/bin/ld: libbb/lib.a(inet_common.o): in function `INET_resolve':
inet_common.c:(.text.INET_resolve+0x4d): warning: Using 'gethostbyname' in statically linked applications requires at runtime the shared libraries from the glibc version used for linking
/usr/bin/ld: networking/lib.a(inetd.o): in function `reread_config_file':
inetd.c:(.text.reread_config_file+0x254): warning: Using 'getservbyname' in statically linked applications requires at runtime the shared libraries from the glibc version used for linking
/usr/bin/ld: networking/lib.a(netstat.o): in function `ip_port_str':
netstat.c:(.text.ip_port_str+0x50): warning: Using 'getservbyport' in statically linked applications requires at runtime the shared libraries from the glibc version used for linking
/usr/bin/ld: util-linux/lib.a(rdate.o): in function `rdate_main':
rdate.c:(.text.rdate_main+0xff): undefined reference to `stime'
/usr/bin/ld: coreutils/lib.a(date.o): in function `date_main':
date.c:(.text.date_main+0x25b): undefined reference to `stime'
collect2: error: ld returned 1 exit status
Note: if build needs additional libraries, put them in CONFIG_EXTRA_LDLIBS.
Example: CONFIG_EXTRA_LDLIBS="pthread dl tirpc audit pam"
make: *** [Makefile:718: busybox_unstripped] Error 1解决方案:换更高版本的busybox
如果是老版本的ubuntu应该是不会报错,如果报错要么降低ubuntu版本,要么升级busybox版本。
重新执行上述步骤,安装成功
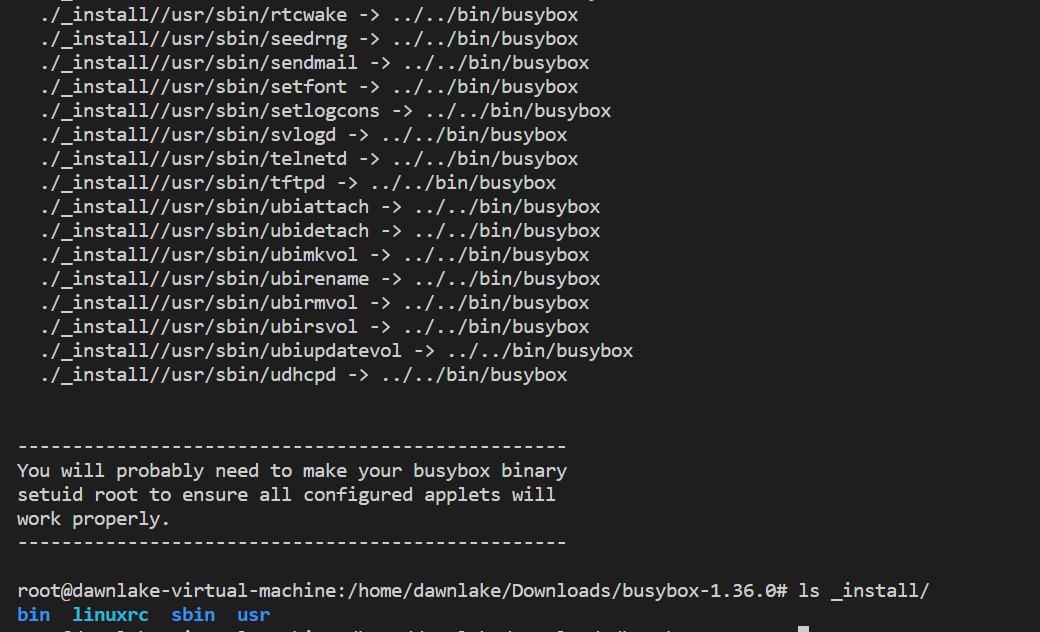
目前还不是完整的文件系统,还待完善,无法直接使用。现在只是目录,内核识别的是文件系统。内核启动需要consle打印信息,但是这里面连dev都没有,所以也不存在什么设备文件。
进入_install目录,补充一些必要的文件或目录,相关的shell命令如下:
1
2
3
4
5
6
7
8
9
10
11
12
13
14
15
16
17
18
19
20
21
22
23
24
25
26
27
28
29
30
31
32
33
34
35
36
37
38
39
40
41
42
43
44
45创建一下三个目录
mkdir etc dev mnt
虚拟文件系统 虚拟文件系统 临时文件系统
mkdir -p proc sys tmp
里面存放文件系统启动的脚本
mkdir -p etc/init.d/
新建并且存放文件系统挂载信息 文件系统启动时会在这个文件中读取挂载信息 将这些文件系统挂载起来
vim etc/fstab
文件系统 挂载路径
proc /proc proc defaults 0 0
tmpfs /tmp tmpfs defaults 0 0
sysfs /sys sysfs defaults 0 0
busybox启动时执行的代码
vim etc/init.d/rcS
echo -e "Welcome to tinyLinux"
Linux mount命令是经常会使用到的命令,它用于挂载Linux系统外的文件。
/bin/mount -a #把上面的该挂载的挂载
echo -e "Remounting the root filesystem"
mount -o remount,rw / #把根文件系统重新挂载以此设置成可读可写
mkdir -p /dev/pts
mount -t devpts devpts /dev/pts #用来挂载文件系统 -t:指定档案系统的型态,通常不必指定。mount 会自动选择正确的型态。
echo /sbin/mdev > /proc/sys/kernel/hotplug #用来处理热插拔
mdev是busybox提供的一个工具,用在嵌入式系统中,相当于简化版的udev,作用是在系统启动和热插拔或动态加载驱动程序时,
mdev -s
chmod 755 etc/init.d/rcS
busybox执行的文件 一般的linux文件系统没有
vim etc/inittab
::sysinit:/etc/init.d/rcS
::respawn:-/bin/sh
::askfirst:-/bin/sh
::ctrlaltdel:/bin/umount -a -r
chmod 755 etc/inittab
创建设备节点
cd dev
c表示字符型设备 5 主设备号 1 次设备号
mknod console c 5 1
mknod null c 1 3
mknod tty1 c 4 1至此完整的文件系统制作完成
5.制作跟文件系统镜像
先制作一个空的镜像文件;
然后把此镜像文件格式化为ext3格式;
然后把此镜像文件挂载,并把根文件系统复制到挂载目录;
卸载该镜像文件。
打成gzip包。
1
2
3
4
5
6
7
8
9
10
11
12
13
14
15
16
17
18
19
20
21
22!/bin/bash
rm -rf rootfs.ext3
rm -rf fs
dd命令 可以创建一个空的镜像文件
dd if=/dev/zero of=./rootfs.ext3 bs=1M count=32
格式化为ext3的格式
mkfs.ext3 rootfs.ext3
将该镜像文件挂载到fs这样一个临时的目录下
mkdir fs
mount -o loop rootfs.ext3 ./fs
然后把刚才./_install/* 也就是文件系统的东西 拷贝到 fs里 就相当于放到刚才的镜像里边了
cp -rf ./_install/* ./fs
释放挂载点
umount ./fs
打包成内核能识别的压缩模式
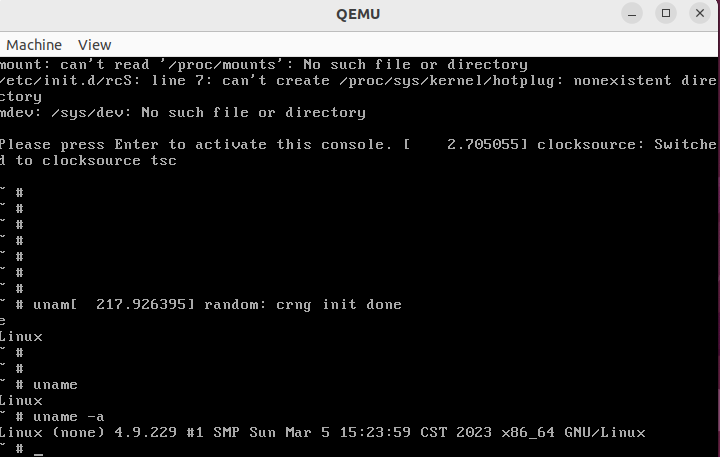
gzip --best -c rootfs.ext3 > rootfs.img.gz下面是重要的步骤成功时的输出


6.qemu启动内核与文件系统
参数说明:
- -kernel 编译好的内核镜像
- -initrd 编译好的文件系统镜像
- -append “init” 表示内核在启动之后转交给文件系统执行的第一个程序
- -serial输出日志
1 | qemu-system-x86_64 \ |
注意:要在图形界面下执行!而且执行目录是linux-4.9.229所在的目录。
很快啊!!!!
