参考链接:linux驱动开发第1讲:带你编写一个最简单的字符设备驱动-今日头条 (toutiao.com)
驱动内容
首先,驱动文件与一般的c文件不同,他有着自己独有的入口函数与出口函数,通过一下方式定义:
1
2
3
module_init(hello_init); //入口函数
module_exit(hello_exit); //出口函数
MODULE_LICENSE("GPL"); //版权入口函数会在插入驱动
insmod时执行,出口函数会在rmmod时执行。接下来看看,入口函数,出口函数也就是驱动插入删除时要做的事情。
入口函数 hello_init 。
1
2
3
4
5
6
7
8
9
10
11
12
13
14
15
16
17
18
19
20
21
22
23
24
25
26
27
28
29
30
int hello_init(void)
{
//根据主次设备号生成一个devnum 主次设备号可以唯一标识
devNum = MKDEV(reg_major, reg_minor);
//将设备号注册到内核
if(OK == register_chrdev_region(devNum, subDevNum, "helloworld")){
printk(KERN_EMERG"register_chrdev_region ok \n");
}else {
printk(KERN_EMERG"register_chrdev_region error n");
return ERROR;
}
printk(KERN_EMERG" hello driver init \n");
// struct cdev 是内核中的字符设备
gDev = kzalloc(sizeof(struct cdev), GFP_KERNEL);
//初始化一个file结构体 代表设备
gFile = kzalloc(sizeof(struct file_operations), GFP_KERNEL);
//给file结构体中的函数操作赋值 右侧是函数指针 指明操作
gFile->open = hello_open;
gFile->read = hello_read;
gFile->write = hello_write;
gFile->owner = THIS_MODULE;
//内核中找到设备号 就能找到cdev 与 file_operations
//建立gDev 与 gFile之间的联系 cdev的成员
cdev_init(gDev, gFile);
//又建立了gDev 与 设备号的联系
cdev_add(gDev, devNum, 3);
return 0;
}


总结下来,设备插入时要完成的核心功能:
- 用设备的主设备号和次设备号去生成一个驱动ID方便程序调用与给驱动划分归类,暂且认为是这个作用。
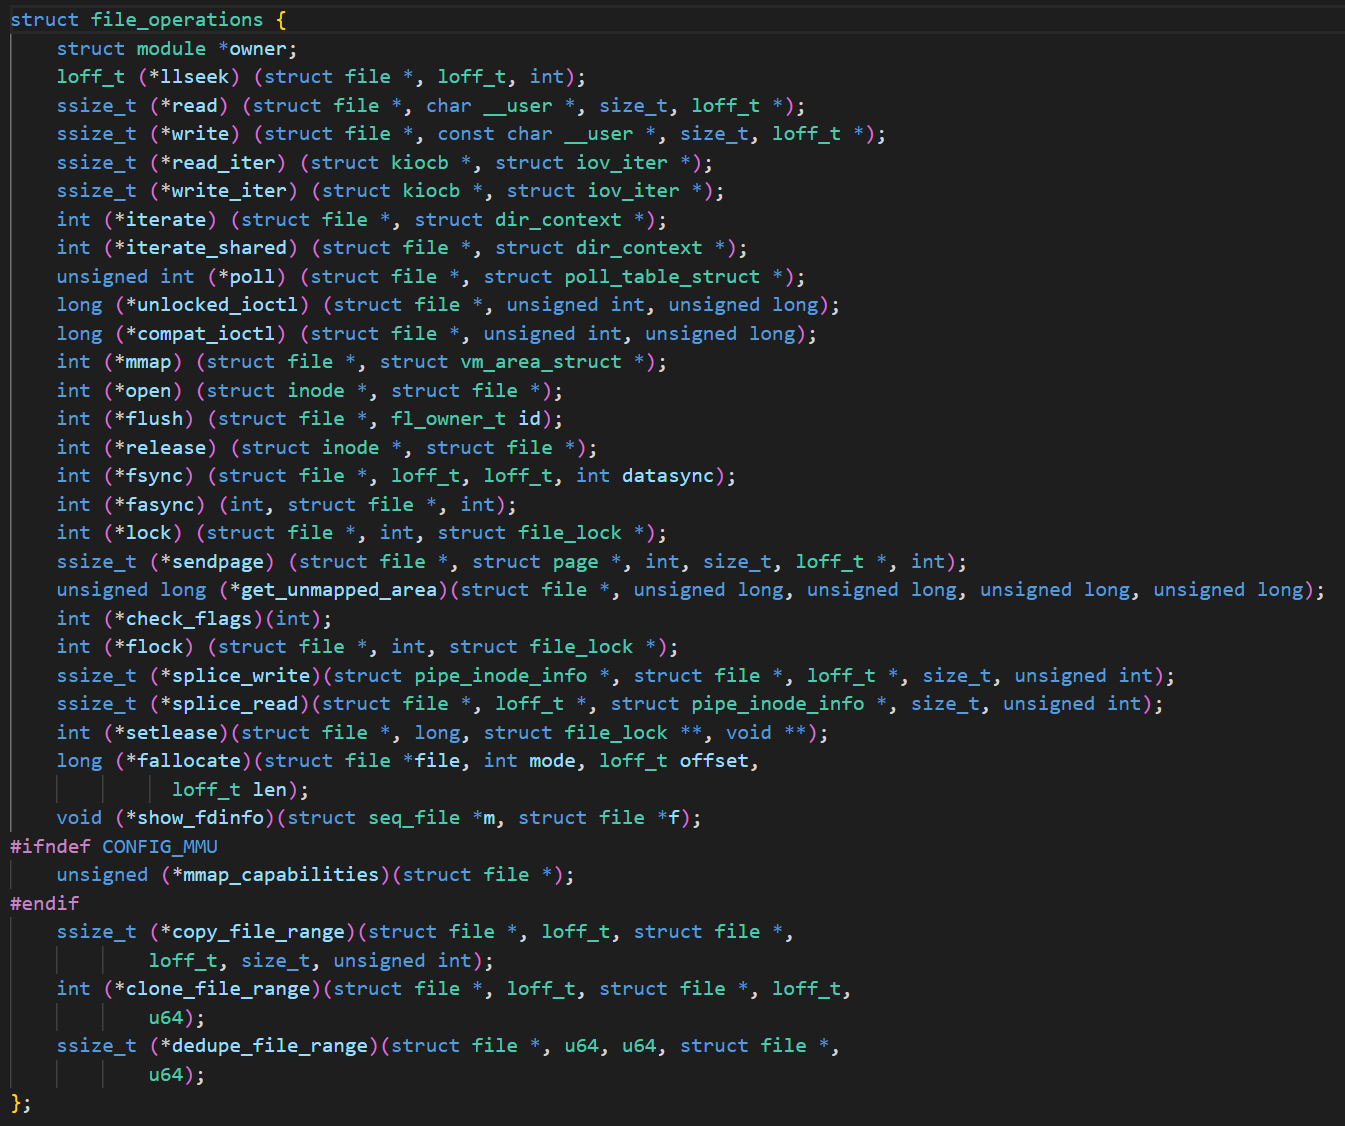
- 然后申请两块地址用于初始化两个构造体,一个构造体代表设备,一个构造体代表函数操作。内核操作设备实际上就是像操作文件一样。所以从上图
function_operation结构体的定义可以看出有很多成员是函数指针。到时候就是要把设备要做的操作赋给这些函数指针。 - 然后看到设备字符型
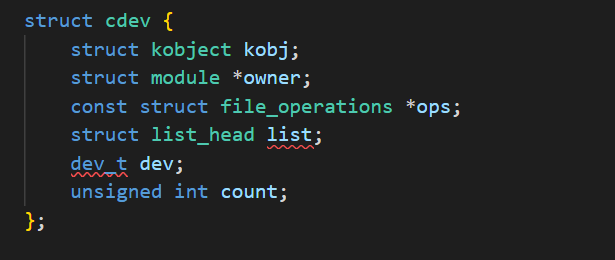
cDev的定义中有一个成员是function_operation。所以接下来通过cdev_init(gDev, gFile)建立起二者的联系,然后再通过cdev_add(gDev, devNum, 3),让devNum也就是第一步获得的驱动ID也与cDev建立其联系
至此,驱动初始化工作完成。这也是
insmod命令执行时候要做的工作。对文件描述符的读写操作,最终会操作到一个叫做file的结构体上,这个结构体似乎和dev是一个东西。
出口函数hello_exit 很简单
1
2
3
4
5
6
7
//驱动的卸载
void __exit hello_exit(void)
{
cdev_del(gDev);
unregister_chrdev_region(devNum, subDevNum);
return;
}最后简单定义驱动的一些功能也就是
function_operation的成员将要被赋值的函数指针的函数的定义,就是一些简单的打印:1
2
3
4
5
6
7
8
9
10
11
12
13
14
15
16int hello_open(struct inode *p, struct file *f)
{
printk(KERN_EMERG"hello_open\r\n");
return 0;
}
ssize_t hello_write(struct file *f, const char __user *u, size_t s, loff_t *l)
{
printk(KERN_EMERG"hello_write\r\n");
return 0;
}
ssize_t hello_read(struct file *f, char __user *u, size_t s, loff_t *l)
{
printk(KERN_EMERG"hello_read\r\n");
return 0;
}让我们看看makefile文件都做了什么:
1
2
3
4
5
6
7
8
9
10
11
12
13ifneq ($(KERNELRELEASE),)
obj-m := helloDev.o
else
PWD := $(shell pwd)
KDIR := /lib/modules/`uname -r`/build
all:
make -C $(KDIR) M=$(PWD)
clean:
rm -rf *.o *.ko *.mod.c *.symvers *.c~ *~
endif
# 变量 KERNELRELEASE 由内核定义首先,有一个寻找环境变量的判断语句,如果没找到的话,就会去到内核的根目录下执行内核的Makefile。这是因为驱动也需要链接c运行时库和glibc库,但是驱动不能链接和使用应用层的任何lib库,驱动需要引用内核的头文件和函数。所以,编译的时候需要指定内核源码的地址。这里我想在自己的环境里做实验比较方便,所以就把内核源码根目录设置为了本机内核源码的根目录。执行过后环境变量中便有了
KERNELRELEASE。其实当前内核是否编译成功正常工作。,内核的编译系统会将所有的obj-m变量中的.o文件链接成为.ko文件,如果是obj-y 就编译内核里面。这就是驱动文件的生成。
测试
编译
1
2
3
4
5
6
7
8
9
10
11
12
13
14
15root@dawnlake-virtual-machine:/home/dawnlake/Downloads/hellodev$ make
make -C /lib/modules/`uname -r`/build M=/home/dawnlake/Downloads/hellodev
make[1]: Entering directory '/usr/src/linux-headers-5.19.0-35-generic'
warning: the compiler differs from the one used to build the kernel
The kernel was built by: x86_64-linux-gnu-gcc (Ubuntu 11.3.0-1ubuntu1~22.04) 11.3.0
You are using: gcc (Ubuntu 11.3.0-1ubuntu1~22.04) 11.3.0
CC [M] /home/dawnlake/Downloads/hellodev/helloDev.o
MODPOST /home/dawnlake/Downloads/hellodev/Module.symvers
CC [M] /home/dawnlake/Downloads/hellodev/helloDev.mod.o
LD [M] /home/dawnlake/Downloads/hellodev/helloDev.ko
BTF [M] /home/dawnlake/Downloads/hellodev/helloDev.ko
Skipping BTF generation for /home/dawnlake/Downloads/hellodev/helloDev.ko due to unavailability of vmlinux
make[1]: Leaving directory '/usr/src/linux-headers-5.19.0-35-generic'
root@dawnlake-virtual-machine:/home/dawnlake/Downloads/hellodev# ls
helloDev.c helloDev.ko helloDev.mod helloDev.mod.c helloDev.mod.o helloDev.o Makefile modules.order Module.symvers test.c可以看到先编译到
helloDev.mod.o,再链接到helloDev.ko检查驱动的插入删除操作,
dmesg -c清除内核日志1
2
3
4
5
6
7
8
9root@dawnlake-virtual-machine:/home/dawnlake/Downloads/hellodev$ insmod helloDev.ko
root@dawnlake-virtual-machine:/home/dawnlake/Downloads/hellodev$ dmesg -c
[20663.380995] register_chrdev_region ok
[20663.381004] hello driver init
root@dawnlake-virtual-machine:/home/dawnlake/Downloads/hellodev$ lsmod | grep hell
helloDev 16384 0
root@dawnlake-virtual-machine:/home/dawnlake/Downloads/hellodev$ rmmod helloDev
root@dawnlake-virtual-machine:/home/dawnlake/Downloads/hellodev$ lsmod | grep hell
root@dawnlake-virtual-machine:/home/dawnlake/Downloads/hellodev$看看就能懂。
测试代码:
1
2
3
4
5
6
7
8
9
10
11
12
13
14
15
16
17
18
19
20
21
22
23
24
25
26
27
28
29
30
31
32//test.c
int main(int argc, char *argv[])
{
int fd, i;
int r_len, w_len;
fd_set fdset;
char buf[DATA_NUM]="hello world";
memset(buf,0,DATA_NUM);
fd = open("/dev/hello", O_RDWR);
printf("%d\r\n",fd);
if(-1 == fd) {
perror("open file error\r\n");
return -1;
}
else {
printf("open successe\r\n");
}
w_len = write(fd,buf, DATA_NUM);
r_len = read(fd, buf, DATA_NUM);
printf("%d %d\r\n", w_len, r_len);
printf("%s\r\n",buf);
return 0;
}执行之前需要还需要创建hello驱动的设备文件,创建设备文件,不然会显示打不开
1
2
3
4
root@dawnlake-virtual-machine:/home/dawnlake/Downloads/hellodev$ ./a.out
-1
open file error
: No such device or address1
mknod /dev/hello c 232 0
这里的232和0要跟驱动文件里定义的主次设备号对应起来!

分析:
正常应用里面的read write函数是c库里面的函数,这两个函数的实现使用了系统调用。由应用层产生中断,陷入到内核里面,系统调用执行响相应动作,再把返回值返回给应用层用户空间。
然后再次执行dmesg查看驱动输出,发现驱动里的hell_open, hello_write, hello_read被依次调用了。

忽略两次初始化。。。。。。
添加到内核源码树
字符型设备放在 /driver/char 里头
完整代码:
1 | //helloDev.c |
1 | ##Makefile |
1 |
|